Cabinets endure daily wear, accumulating scratches, stains, and fading over time. Learning how to paint a cabinet restores its appearance while adding a protective layer that extends its lifespan. A well-painted cabinet transforms kitchens, bathrooms, and storage spaces, complementing new design trends or personal preferences. Mastering the proper techniques ensures a professional-looking finish, making this a valuable skill for home improvement projects.
A Step-By-Step Guide to Painting a Cabinet
Revamping cabinets with a fresh coat of paint can transform any space, giving it a polished and updated appearance. Proper preparation, technique, and finishing touches ensure a smooth, professional result. Whether you’re refreshing kitchen cabinets or upgrading bathroom storage, following the right steps will make the process easier and more effective.
Preparing to Paint a Cabinet
Choosing the Right Type of Paint for Cabinets
Selecting high-quality paint prevents chipping and fading over time. Oil-based and acrylic paints offer durability, while latex provides an easier application with low fumes. A semi-gloss or satin finish works best, balancing aesthetics and easy maintenance.
Gathering Essential Tools and Materials
Having the right tools makes the process smoother and prevents mistakes. Brushes, rollers, sandpaper, painter’s tape, and drop cloths help control mess and achieve even coverage. A screwdriver is necessary for removing hardware, while a degreaser ensures a clean surface before sanding.
Cleaning and Sanding the Cabinet Surface
Dirt and grease prevent paint from sticking properly, leading to uneven coverage. Using a degreaser or mild soap removes buildup, allowing for better adhesion. Sanding roughens the surface slightly, helping the primer and paint bond more effectively.
Removing Doors, Drawers, and Hardware
Painting around hinges and handles creates an uneven and messy result. Unscrewing doors and drawers allows for full coverage and a more professional finish. Properly storing hardware prevents misplacement, making reassembly easier after painting.
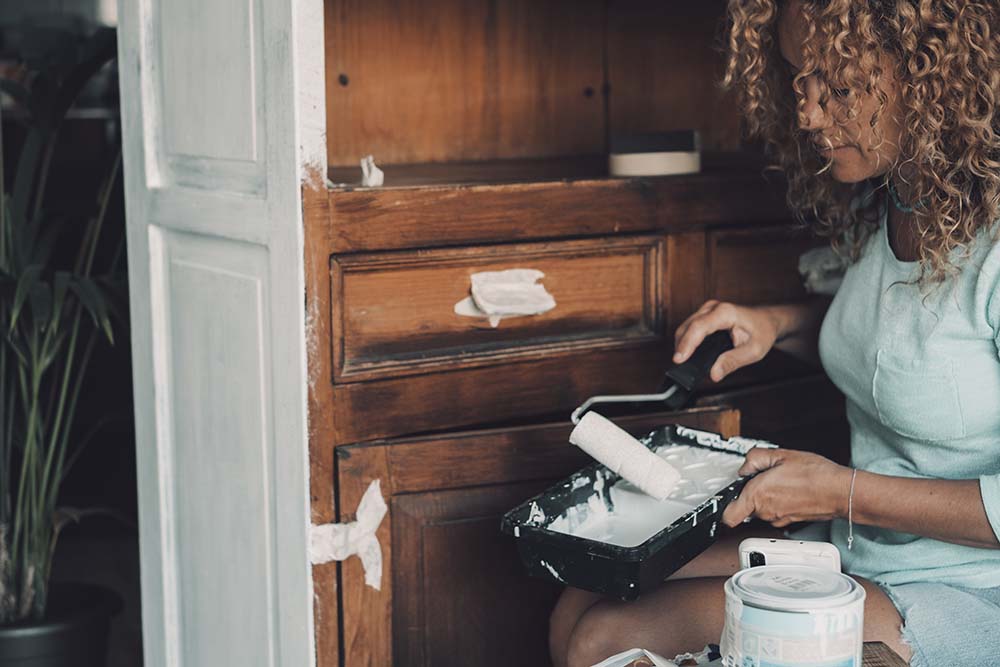
Priming the Cabinet
Primer acts as a base layer that helps paint adhere evenly, preventing stains from seeping through. Cabinets often have slick surfaces or previous finishes that can cause paint to peel without proper priming. A high-quality primer improves durability, ensures better coverage, and enhances the final color, creating a smooth and long-lasting finish.
Selecting the Best Primer for Cabinets
Oil-based primers offer strong adhesion and stain-blocking properties, making them ideal for wood and laminate surfaces. Water-based primers dry faster and produce fewer fumes, providing a more eco-friendly option. Shellac-based primers work well for sealing knots and preventing discoloration from previous stains.
Applying Primer for Smooth and Lasting Results
Using a brush or roller ensures even coverage across the entire surface. Light, thin coats prevent drips and allow the primer to bond correctly with the cabinet. Covering all areas, including edges and corners, prepares the surface for a flawless paint application.
Allowing Proper Drying Time Before Painting
Rushing into painting before the primer dries leads to peeling and an uneven finish. Waiting for the recommended drying time ensures a strong foundation that holds up over time. Light sanding after the primer dries smooths out any rough spots and improves paint adhesion.
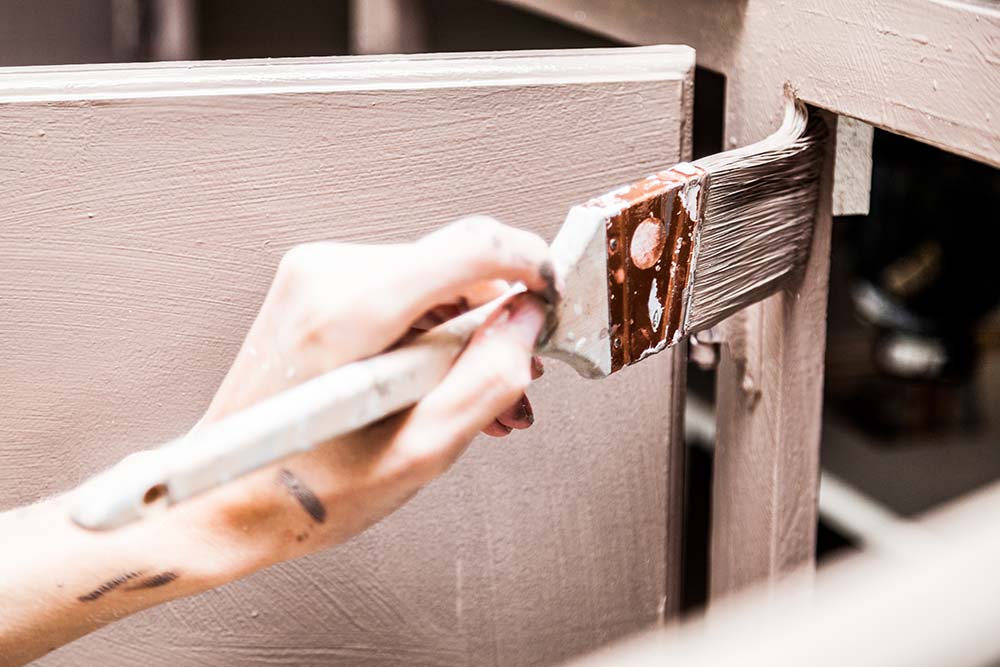
Proper Techniques in Cabinet Painting
Applying paint correctly ensures a smooth, professional finish that lasts for years. Uneven strokes, drips, and brush marks can ruin the appearance of a freshly painted cabinet. Using the right tools and techniques helps create a flawless surface that enhances the cabinet’s look. Careful application, layering, and drying prevent common painting mistakes, making the result more durable.
Using a Brush, Roller, or Sprayer for Application
Each tool offers different benefits depending on the desired finish. A high-quality brush works well for detailed areas and edges, while a roller covers flat surfaces quickly with minimal streaks. A paint sprayer provides an ultra-smooth, factory-like finish but requires proper masking and ventilation. Combining these tools ensures even coverage across the entire cabinet.
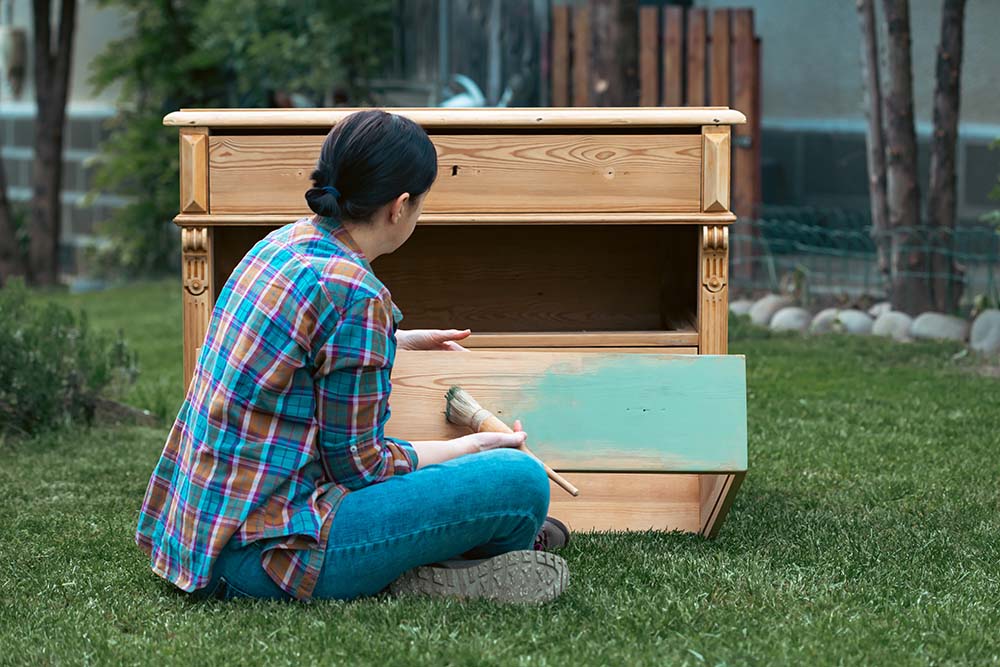
Achieving Smooth and Even Coats
Applying thin coats prevents drips and allows the paint to dry evenly. Overloading the brush or roller leads to streaks and an uneven texture. Light, consistent strokes help distribute the paint without leaving brush marks. Letting each coat dry fully before adding another builds a strong, uniform layer.
Applying Multiple Layers for Durability
One coat of paint rarely provides enough coverage, especially for darker cabinets or drastic color changes. Two to three coats create a richer, more uniform finish that resists wear. Each layer should be applied after the previous one has thoroughly dried to avoid smudging or peeling. Light sanding between coats removes imperfections and helps the next layer adhere better.
Avoiding Streaks, Drips, and Brush Marks
Dragging a brush too slowly leaves visible strokes, while pressing too hard creates ridges. Keeping a steady hand and moving in the same direction as the wood grain reduces the chances of streaking. Checking for drips along edges and corners prevents hardened paint clumps from forming. Fixing mistakes immediately before the paint dries ensures a clean and polished result.
Drying and Curing After Painting a Cabinet
Allowing paint to dry and cure properly strengthens the finish and prevents damage. Rushing the process leads to smudges, tacky surfaces, and peeling over time. Cabinets endure frequent use, making a fully cured surface essential for long-term durability. Proper drying and curing techniques ensure the paint hardens correctly, creating a lasting and resilient finish.
How Long to Wait Between Coats
Each layer of paint needs time to dry before applying another coat. Waiting at least a few hours between coats prevents smudging and allows the paint to settle evenly. A well-ventilated area speeds up the drying process while reducing moisture buildup. Checking the manufacturer’s recommendations helps determine the best drying time for the specific type of paint used.
Best Practices for a Flawless Finish
Keeping dust and debris away from freshly painted cabinets prevents imperfections. Positioning cabinets in a clean, controlled environment minimizes the risk of particles sticking to the surface. Avoiding excessive handling while the paint dries preserves the smoothness of each coat. Lightly sanding between coats enhances adhesion and removes any minor bumps.
Understanding Curing Time for Durability
Dry paint may feel solid, but full curing takes longer and ensures maximum hardness. Most paints require several days to cure fully, while some take up to a month for complete durability. Avoiding heavy use during this period prevents dents, chips, and unwanted marks. Giving the paint enough time to harden strengthens the surface against daily wear and tear.
Preventing Damage While the Paint Sets
Placing cabinet doors and drawers back too soon increases the risk of sticking or smudging. Using temporary spacers helps prevent painted surfaces from touching and causing unwanted marks. Keeping cabinets open for airflow allows the paint to settle without trapping moisture. During the curing phase, gentle use preserves the finish and extends the cabinet’s lifespan.
Reassembling and Maintaining a Painted Cabinet
Putting the cabinet back together once the paint has dried and cured completes the transformation. Proper reassembly ensures doors and drawers function smoothly without damaging the new finish. Regular maintenance helps preserve the fresh look and prevents premature wear. Careful handling during reinstallation and routine upkeep keeps the cabinet looking polished for years. Cleaning and protective measures avoid scratches, chips, and fading.
Attaching Hardware and Reassembling Parts
Reinstalling handles, knobs, and hinges should be done carefully to avoid scratching the paint. Using a manual screwdriver instead of a power drill prevents overtightening, which can damage the cabinet or chip the finish. Aligning doors and drawers correctly ensures smooth operation without sticking. Checking for any paint buildup around hinge areas prevents opening and closing obstruction. Softening screw holes with a bit of wax or soap helps hardware slide in smoothly without stripping the wood.
Ensuring Doors and Drawers Open Smoothly
Paint buildup can make doors and drawers feel stiff or challenging to open. Sanding edges lightly removes excess paint and allows them to move freely. Applying a thin layer of wax along drawer tracks or door edges helps prevent sticking. Testing each part before finalizing reassembly ensures no adjustments are needed after installation. Cleaning off dust or debris from the sanding process keeps the cabinet pristine.
Cleaning Methods to Preserve the Finish
Harsh chemicals and abrasive sponges wear down the paint and cause fading. A mild soap solution and a soft cloth effectively clean surfaces without damaging the finish. Wiping spills immediately prevent moisture from seeping into the wood and causing swelling. Using a microfiber cloth reduces streaks and keeps the paint looking smooth. Polishing with a gentle furniture wax adds a layer of protection against stains and scratches.
Protecting the Surface from Daily Wear
Placing felt pads inside cabinets prevents dishes and utensils from scratching the interior. Using coasters or mats under frequently used items reduces friction and paint chipping. Keeping cabinet handles clean minimizes grease buildup, which can break down the paint over time. Opening and closing doors gently prevent stress on hinges and paint cracking. Regular inspections for minor damage allow for quick touch-ups before issues worsen.
Troubleshooting Common Paint Issues Over Time
Peeling or chipping often results from prolonged exposure to moisture or improper priming. Lightly sanding and repainting affected areas restores a seamless look without needing a full repaint. Fading or discoloration happens when cabinets are exposed to direct sunlight for long periods. Installing curtains or using UV-protective coatings preserves the color and prevents dullness. Addressing minor damage early prevents costly repairs and extends the cabinet’s lifespan.
How Painting a Cabinet Enhances Style and Durability
A freshly painted cabinet transforms the look of a space while adding a protective layer that extends its lifespan. Proper preparation, careful application, and adequate drying time create a durable finish that resists wear and tear. High-quality paint and regular maintenance keep the surface smooth and vibrant for years. Reassemble components correctly and handle daily use carefully to prevent damage and preserve the cabinet’s new appearance.
Get expert advice on how to paint a cabinet by visiting the Euro Painting blog today.